This article should serve as a guide for your initial installation and setup of xByte’s Backups as a Service (BaaS) agent.
After ordering your BaaS product, you’ll need to log in to your Billing Control Panel to obtain the installer and your BaaS credentials.
Downloading BaaS Installer
-
Once logged in, select Services > My Services from the left-hand side.
-
Select your BaaS service from your list of active products/services.
-
This will bring you to the manage product page where you can view information pertaining to your BaaS product.
i) Home: Contains the username & password for your BaaS, as well as your storage limits.
ii) Jobs List: Shows previous backup Jobs.
iii) Downloads: Download links for BaaS (Windows/Linux/MacOS) -
Click on Downloads and download the installer for the OS you plan to secure with backups.


Installing BaaS on Windows
The following steps assume you already have downloaded the ClientInstaller(64-bit).zip file and uploaded it to the device you wish to secure with backups. The Windows installer comes in a .zip file while the Linux and macOS installers come as .run and .pkg files.
-
Locate your ClientInstaller(64-bit).zip file, and extract the contents to a directory you can work in.
-
Once extracted, go into the ClientInstaller(64-bit) folder and open the installer.exe file.
-
Once the installer opens, choose your language and click Ok.
-
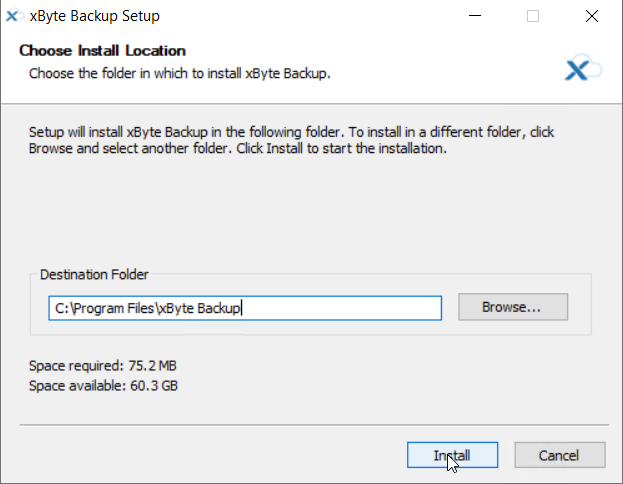
We recommend keeping the installation location default. Select Install.
-
Select Next once the installation completes. Then select Finish with the “Launch xByte Backup” checkbox ticked.

-
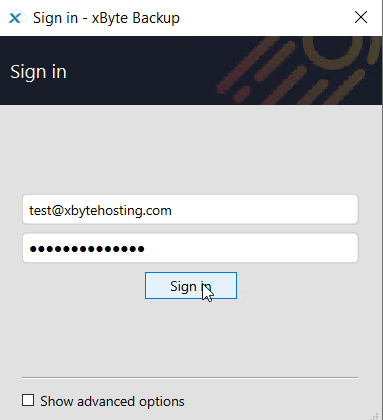
The xByte Backup application should open and ask you to sign in. You’ll need your username and password found in Step 3 of Downloading BaaS Installer. Input your username/password and select Sign In.
-
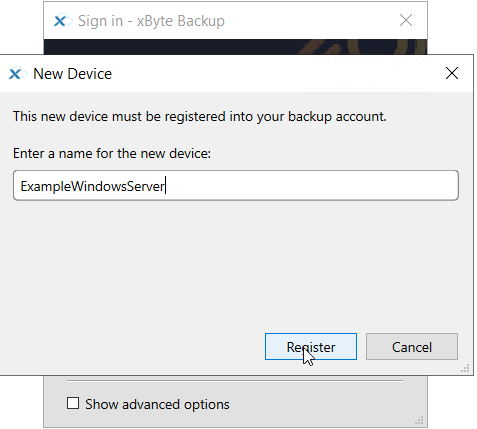
Enter a unique and rememberable name for the device, then select Register.

Now that your Device has been configured, you can begin creating protected items! Below is our documentation on how to create and manage your protected items.