This article should serve as a guide for creating Protected Items using xByte’s Backup as a Service (BaaS). This also assumes that the xByte Backup service is already installed on your device.
Please reference our “Getting Started with BaaS” article if you haven’t installed the xByte Backup service.
Files and Folders Nightly Backup
-
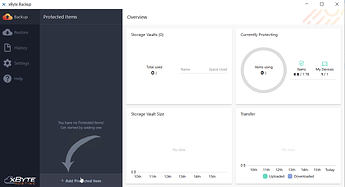
Open your xByte Backup application, and select Add Protected Item.
-
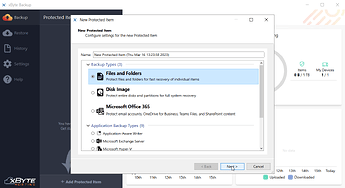
Make sure “Files and Folders” is chosen, then select Next.
You can name the protected item something custom using the “Name” input at the top.
-
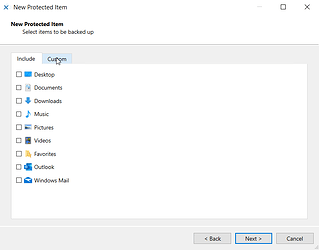
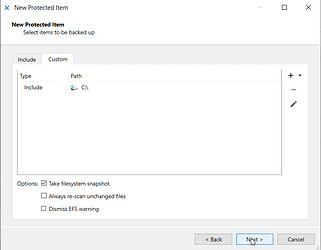
The “Include” tab provides common directories to backup. Select Custom to choose specific files, folders, and hard drives to back up.
-
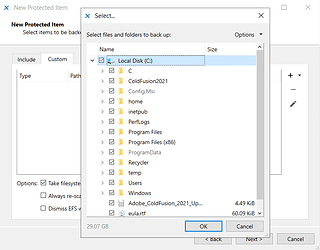
Select the + sign to the right. This gives you a list of drives/directories/files you can back up. Clicking on the drop-down will expand the hard drive. Ticking checkboxes next to files/folders/drives signifies that it should be backed up.
This example is backing up the entire C:\ drive. Select OK once you’ve made your selections.
-
Review the files/folders/drives you’ve chosen to backup and select Next.
-
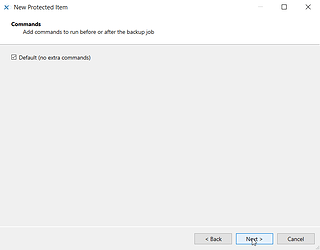
Leave commands as default and select Next.
-
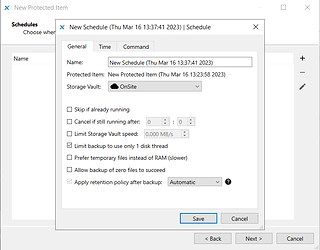
Select the + sign to the right. This’ll open a new window with 3 tabs. We’ll start with the “General” tab. We recommend limiting backup to use only 1 thread. Once you’ve made your changes, select the Time tab.
-
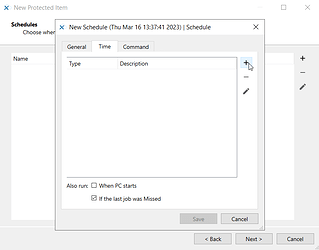
We recommend enabling the “Also Run: If the last job was Missed” option. Then select the + sign in the top right to add a new backup schedule.
-
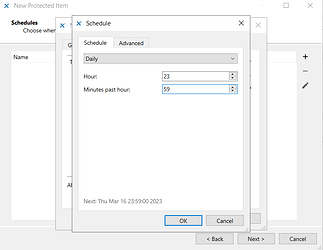
Change the “Schedule” drop-down to Daily, and input 23 for the “Hour” and 59 for the “Minutes past hour”. In the “Advanced” tab, set the “Random job delay” to 300 minute(s). This sets backups to run anytime between 12 AM and 5 AM. Select OK when done.
-
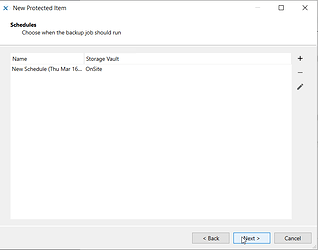
Review your Schedule and select Next.
-
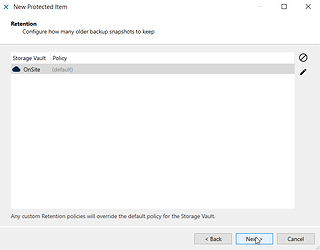
If you wish to retain backups for a certain number of days, then select the ‘Pencil’ icon and you’ll be able to create a custom retention policy. Otherwise, select Next to have backups retained forever.
-
Select Finish to finalize your protected item! After clicking Finish it’ll ask if you wish to run a backup now. We recommend going ahead and running your first backup.
Require Our Assistance?
Again, please don’t hesitate to contact our Engineers if you’re encountering issues configuring your protected items. Our team of Engineers will be more than happy to assist.
