Email clients are used every day for connecting from local devices to email providers to allow you to manage your emails directly from your device without needing to log in to your email from a web page. The goal of this article is to provide general guidance on connecting to your email provider from your local device.
Technical definitions
| Term | Definition |
|---|---|
| SMTP | (Simple Mail Transfer Protocol): SMTP is responsible for sending emails from your email client or server to the recipient’s email server. It’s like the courier service that delivers your mail to the right address. |
| POP | (Post Office Protocol): POP allows you to download and store emails from a mail server to your computer or device. It’s like getting mail from a post office and keeping it at home. However, once you download the emails, they usually get removed from the server. |
| IMAP | (Internet Message Access Protocol): IMAP also lets you access and manage emails on a mail server, but it keeps them there instead of downloading them. It’s like having your email stored in the cloud, accessible from multiple devices. Any changes you make (read/unread, folders) are synced across devices. |
| Exchange ActiveSync | Exchange ActiveSync is a protocol that helps synchronize your email, contacts, calendars, and other data between an email server (like Microsoft Exchange) and your mobile devices. It ensures that any changes you make on one device are reflected on all your connected devices in real-time. |
| Incoming Server | The incoming server, also known as the POP or IMAP server, is responsible for receiving incoming emails and delivering them to your email client or app. When you configure your email client, you need to specify the incoming server settings, including the server address (such as “pop.example.com” or “imap.example.com”) and the protocol (POP or IMAP) you’ll use to retrieve your emails. |
| Outgoing Server | The outgoing server, also known as the SMTP server, handles the sending of emails from your email client or app to the recipient’s email server. To send an email, you need to configure your email client with the outgoing server settings, including the server address (such as “smtp.example.com”) and authentication credentials (usually your email address and password). |
| Outgoing Port | This port is used when you send an email. It’s like the lane your email takes to leave your device and reach the email server so it can be sent to the intended recipient. It ensures that your email finds the right path. |
| Incoming Port | This port is used when you receive emails. It’s like the lane your email takes to travel from the email server to your device, making sure it arrives safely in your email app or program. |
Common ports and protocols
| protocol | Available Ports |
|---|---|
| SMTP | Port 25: Standard SMTP port for outgoing mail (unencrypted) Port 465: SMTPS (SMTP over SSL/TLS) port for secure outgoing mail Port 587: Mail submission port for outgoing mail (often used with STARTTLS for encryption) |
| POP3 | Port 110: Standard POP3 port for incoming mail (unencrypted) Port 995: POP3S (POP3 over SSL/TLS) port for secure incoming mail |
| IMAP | Port 143: Standard IMAP port for incoming mail (unencrypted) Port 993: IMAPS (IMAP over SSL/TLS) port for secure incoming mail |
IOS mobile
- Go to
Settings>Mail>Accounts>Add Account. - If your email provider is listed, select it; if not, choose
Other. - Tap
Add Mail Account. - Enter your name, email address, password, and a description for your account. Tap
Next. - Choose
IMAPat the top of the new account screen. - Fill in the
Incoming Mail ServerandOutgoing Mail Serverfields:
-
Host Name:
imap.mailprovider.com(Incoming)
smtp.mailprovider.com(Outgoing)NOTE: The incoming and outgoing hostname will vary between email providers and in some cases you can use the same hostname for both incoming and outgoing.
-
User Name: your full email address
-
Password: your email passwordReplace
mailprovider.comwith the details from your actual email service provider.

- Tap
Next. Mail will try to find the email settings and finish setting up your account. - If Mail finds your email settings, tap
Doneto complete your account setup.
If Mail can’t find your email settings, then you’ll need to enter them manually. If that’s the case or you encounter any issues, it’s best to consult your email service provider’s support or help documentation.
Mozilla Thunderbird
-
Open your Mozilla Thunderbird desktop application.
-
If this is your first time using Thunderbird, you’ll see a prompt to set up a new account. Click
Email. If you’re adding another account, click onLocal Folders, then selectEmail Account. -
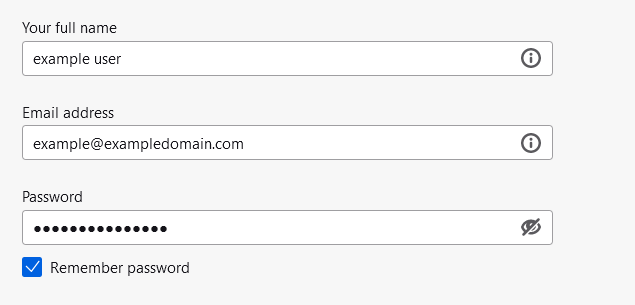
Enter your name (as you’d like it to appear on outgoing mail), email address, and password. You can choose to have Thunderbird remember your password. Click
Continue.
-
If Thunderbird is not able to automatically configure your email settings, click on
Manual config.
-
Enter the following details:


-
Incoming IMAP:
imap.mailprovider.com
Port 993 (or as provided by your email service)
SSL/TLS
Normal Password -
Outgoing SMTP:
smtp.mailprovider.com
Port 465 (or as provided by your email service),
SSL/TLS
Normal PasswordRemember to replace
mailprovider.comwith the details from your actual email service provider.NOTE: The incoming and outgoing hostname will vary between email providers and in some cases you can use the same hostname for both incoming and outgoing.
-
Click
Re-test Configuration. If the configuration is valid, theDonebutton will be enabled. -
Click
Done. Your account should now be set up and ready to use.If you encounter any issues or the server requires more specific settings, don’t hesitate to reach out to [email protected].
Mac Mail
-
Open the Mail app on your Mac.
-
If you’re opening Mail for the first time, click
Continueto start setup. If not, from the Mail menu, selectAdd Account. -
In the dialog box, choose
Other Mail Accountfrom the list, then clickContinue. -
Enter your name, email address, and password, then click
Sign In. -
If Mail can’t detect the settings automatically, you’ll need to enter them manually:

-
Email Address: your full email address
-
User Name: your full email address or the part before the ‘@’ symbol, depending on your provider’s settings
-
Password: your email password
-
Account Type:
IMAP -
Incoming Mail Server:
imap.mailprovider.com -
Outgoing Mail Server:
smtp.mailprovider.comReplace
mailprovider.comwith the details from your actual email service provider.NOTE: The incoming and outgoing hostname will vary between email providers and in some cases you can use the same hostname for both incoming and outgoing.

- Click
Sign In. - Mail will attempt to verify the account. If successful, you’ll see checkboxes for Mail and Notes. Uncheck Notes if you don’t wish to use it, and then click
Done.
Your account should now be set up in the Mac Mail application. If you’re encountering any issues, don’t hesitate to reach out to [email protected]