Are you looking to transfer a domain to our registry? Follow this guide for helping you accomplish a domain transfer.
Transferring Domains
To transfer a domain registration from one registrar to another, you’ll need to follow these general steps:
- Make sure that the domain is eligible for transfer. Generally, a domain must be at least 60 days old, unlocked, and not under any transfer holds or disputes.
- Obtain an authorization code (also known as an EPP code or transfer key) from your current registrar. This code is needed to initiate the transfer process with your new registrar.
- Disable WhoIS privacy for the domain. If WhoIS privacy is enabled, then your contact information will not get transferred with the domain.
- Purchase a domain transfer service from your new registrar. This will usually involve paying a transfer fee, which can vary depending on the registrar.
- Initiate the transfer process with your new registrar. This typically involves providing the authorization code and following any additional instructions provided by the registrar.
- Wait for the transfer to complete. The process can take up to several days, during which time your domain may be temporarily unavailable.
- Verify that the transfer was successful. Once the transfer is complete, make sure that your website and email are functioning properly at the new registrar.
It’s important to note that different registrars may have slightly different processes for transferring domains, so it’s always a good idea to consult their documentation or support resources for more specific instructions.
Transfer Domain To Us
In order to transfer a domain to our registry, you will need to make sure you have:
-
The domain is unlocked.
-
The transfer authorization code (EPP code).
-
Access to the administrative contact address on the domain (and WHOIS privacy disabled).
Once you have these details you can then proceed with the following steps:
-
Login to the billing control panel
-
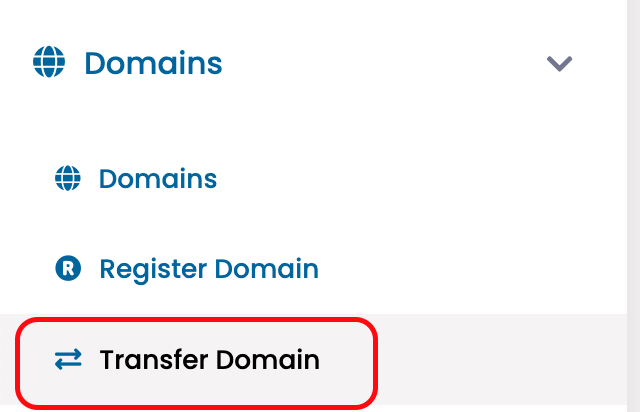
Once logged in click on the ‘Domains’ option from the menu. Then select ‘Transfer Domain’.
-
You will now be asked for the domain name you wish to transfer along with the Authorization Code (EPP code).
-
Click on the ‘Add to Cart’ button once ready to move on.
-
Next you will see the ability to set name servers for the domain. Once the domain is finished moving to our registry the domain will then be updated to use the name servers you set on this page.
Once the transfer is completed, you’ll be able to import your DNS records. If you wish to keep your DNS records until you’ve had the chance to import them with us, then make sure you set your NS records to their current value (ex: ns1.cloudflare.com).


Note: During the transfer process (which can take up to 7 days to complete) the domain will not be able to be updated, so keep this in mind if you need to update the name servers prior to transfer.
-
Once you verify everything looks correct click on the ‘Continue’
-
Upon executing “Checkout” this will finalize your order/transfer of domain.
You should receive the approval email within the next several hours, which you will need to approve so that the registry transfer can begin. The registry transfer typically takes 1-7 days after the approval is accepted.